When you're customizing a component, you can choose an End User License Agreement (EULA) from a list of predefined license template. Depending on the template, its content can be changed or not.
This document shows you how to create and add your own license templates.
License templates locationLicense templates shall be put in the folder:
|
By default, Iceberg proposes the following templates
If you're looking for another license, you can find a list of licenses approved by the Open Source Initiative (OSI) at opensource.org. Then, you would just have to create the corresponding template for that license. License templates formatThere are two license templates formats: one for licenses whose content is unchangeable and the other for licenses whose content can be customized by the user.
Creating an unchangeable content license template
| 1 | Open a new Finder window. | ||
| 2 | Choose Go > Go to Folder… . | ||
| 3 | Type /Library/Application Support/Iceberg/Licenses Templates
in the text field and click Go. | ||
| 4 | Choose File > New Folder and set the name of the new folder to the one that shall be displayed for the template in Iceberg. | ||
| 5 | Within this folder, create a folder for every localized version of the license template.
If you want to provide only one localization for the license template, create only one folder named International.lproj. | ||
| 6 | Create a text file named License.rtf inside every .lproj folder. Copy or write the text of the license in this file.
|
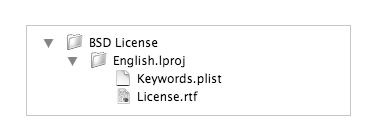
The final files hierarchy should look like this:
| 1 | Open a new Finder window. | |||||
| 2 | Choose Go > Go to Folder… . | |||||
| 3 | Type /Library/Application Support/Iceberg/Licenses Templates
in the text field and click Go. | |||||
| 4 | Choose File > New Folder and set the name of the new folder to the one that shall be displayed for the template in Iceberg. | |||||
| 5 | Within this folder, create a folder for every localized version of the license template.
If you want to provide only one localization for the license template, create only one folder named International.lproj. | |||||
| 6 | Create a text file named License.rtf inside every .lproj folder. Copy or write the text of the license in this file.
| |||||
| 7 | Replace any piece of information you want to be customizable by a MACRO. A MARCO is a string of characters bounded by two % characters on each side. While it is not mandatory, using upper-case characters for a MACRO can prove convenient when it comes to find it inside the text of the license.
| |||||
| 8 | Create a Keywords.plist at same level as the License.rtf file. The Keywords.plist is the standard representation of a dictionaryt according to the Property List format. Each key is one of the MACRO name used in the license text. The value shall be an empty string.
|
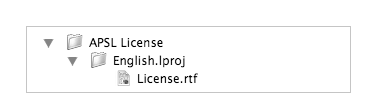
The final files hierarchy should look like this: